
Half-Life 2 Mapping
Tutorial: Converting .VTF to .TGA
Do you want to edit a texture that came with the game? Perhaps you want to edit a texture from a custom map? Well, the Source SDK come ready with the tools you'll need to convert .VTF to .TGA and back to .VTF again for use in Hammer and the game.
info: VTF stands for Valve Texture File
Half-Life 2 textures are now referred to as materials, so we'll call them that from now on. All Half-Life 2 materials are essentially TGA files inside of the .VTF file. TGA is one of the more versatile image formats allowing for regular texture you might have used in Half-Life 1 mapping like JPG's and also allows for transparent areas which could only be achieved, in Half-Life 1 mapping with the GIF format. Some versions of Photoshop however will not be compatible with Alpha Layer option TGA's. To fix this, Adobe.com has a download for the old TGA format. Each material is made up of two files, the .VTF which is the actual texture and a .VMT text file, which you can open with Notepad. The .VMT file is used to tell the game engine and the Hammer editor necessary information about the material you wish to apply in the editor and render in the game. Basically, if you are making a wood texture, information in the .VMT file will tell the game engine that when you shoot or walk or interact with this material in game, it will have wood properties. You will only need the .VTF file in order to convert a material to a .TGA.
In this tutorial,
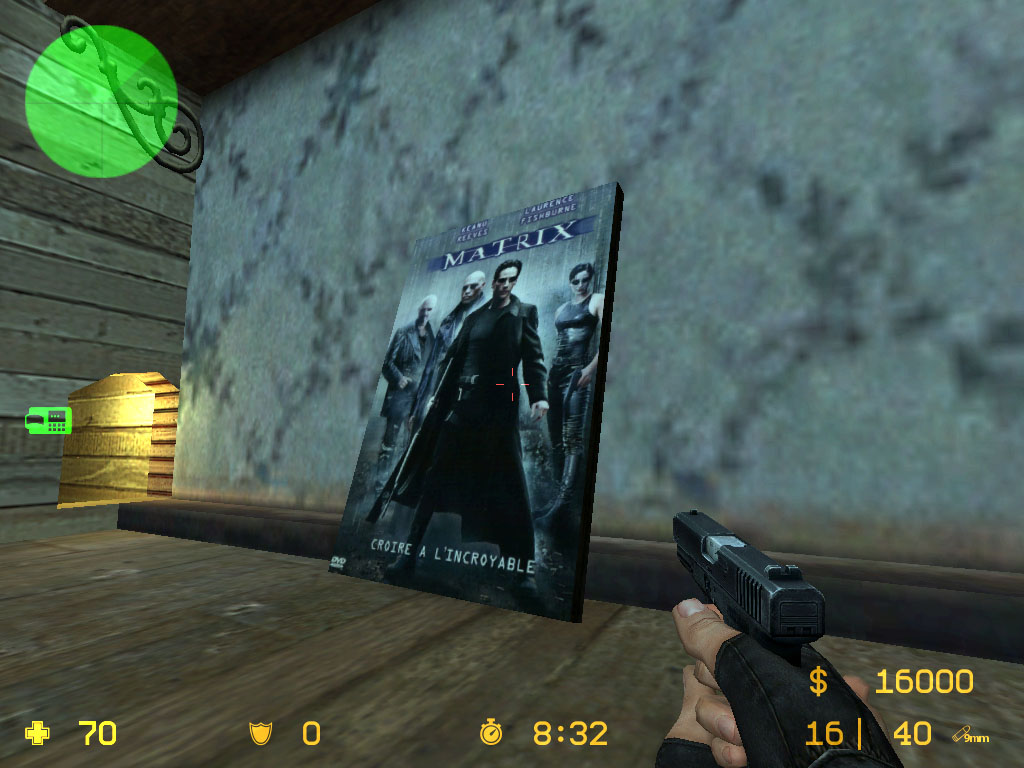
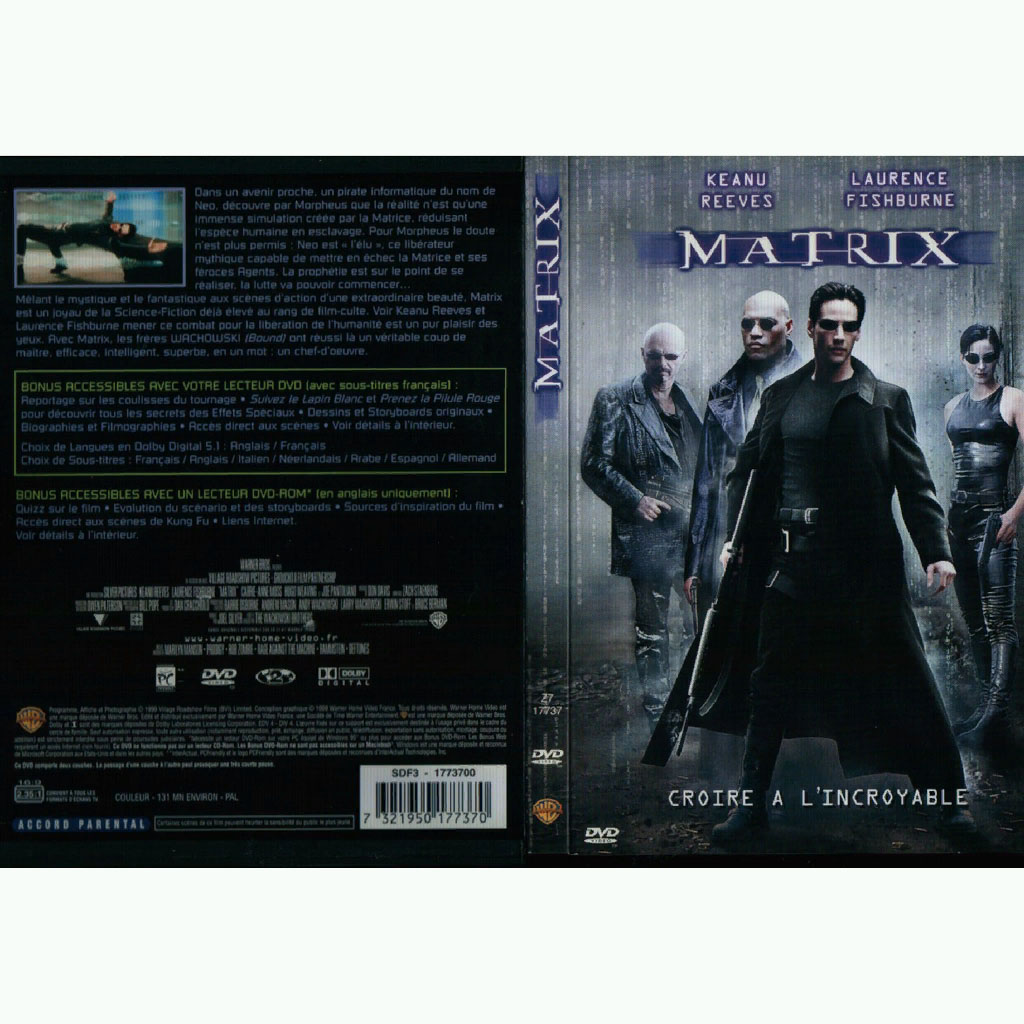
I'm going to convert the Matrix DVD texture you'll find in the CSS map, de_rats.
You can click on the image below for a larger view.
Step 1:
Setting up the VTF2TGA tool for easy use. Browse to the following folder on your computer. Steam/SteamApps/username/sourcesdk/bin folder. To make things easier on yourself, create a directory in this bin directory. Name it: VTF2TGA. Now, we're going to copy three files from the bin directory to this new VTF2TGA directory. Go back to the bin directory and hold down control and click to highlight these three files as shown below:
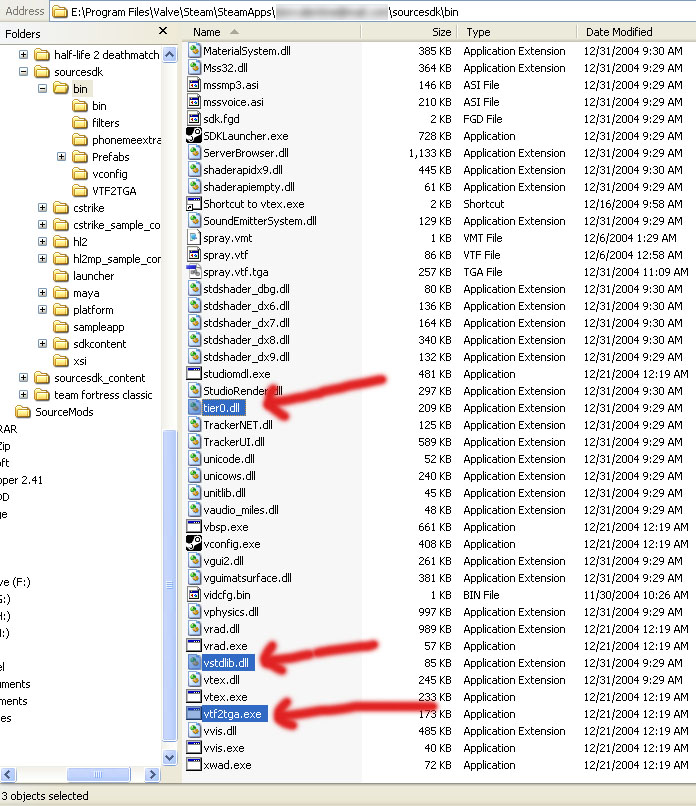
Click on image to enlarge
Step 2:
Go back to the VTF2TGA directory you created in the bin directory and paste the three files. Your directory should now look like the image below:

Click on image to enlarge
Now you are all setup for your material conversions. The next few steps are going to explain how to use the vtf2tga.exe tool. This is a command line only tool meaning you cannot double click on it and use it like a normal windows program. For those that don't know how to run a command line, don't worry. My tutorial will explain it.
Step 3:
Copy and paste your materials you want to convert to TGA into the VTF2TGA directory with the other three files you already pasted there. Like mentioned at the top of the page, we're converting the Matrix DVD texture found in the Counter-Strike Source map, de_rats. So we'll be placing the matrixdvdfull.vtf in the directory, as shown in the image below:
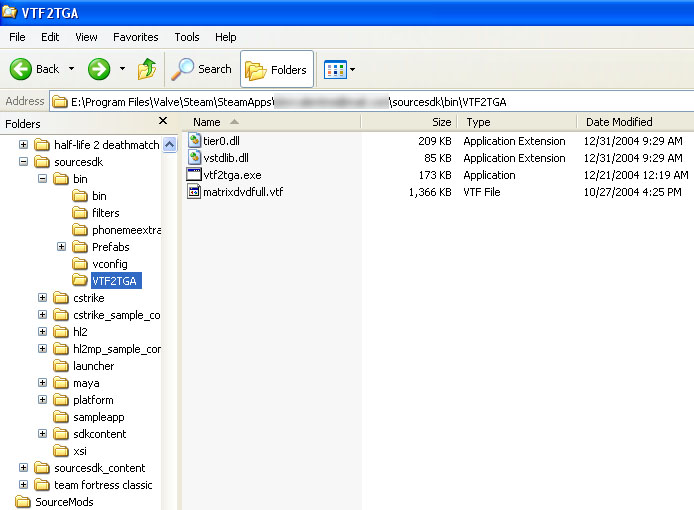
Click on image to enlarge
Step 4:
Ok, now is the hardest part (only if you've never run a command line program before). Click on Start > RUN.

Type cmd as shown in the image above and hit OK.
Step 5:
You'll have to get your command line to point to your VTF2TGA directory, so if you have a standard installation on your C: drive, or similar, just type the next few lines, one at a time, hitting enter after each one. Most likely, on an XP machine, you're starting line will be something like: C:\Documents and Settings\Username
cd ..
cd ..
This should bring you to the main C:\ prompt. Now you're going to type the following to get to your directory. Again, The paths may differ because some HL2 users purchased their HL2 through Steam and some purchased their HL2 from stores, and the install paths are slightly different from what I've read.
cd program files
cd valve
cd steam
cd steamapps
cd yourusername
cd sourcesdk
cd bin
cd vtf2tga
Now you are ready to convert baby!
Step 6:
Ok, so now you're sitting there with this ugly Dos window. It's all good, you're about 60 seconds away from converting your first .VTF material to a .TGA image.
In this tutorial of course, we're converting the matrixdvdfull.vtf to a TGA file, so type the line below, making sure to specify the name of your .VTF
vtf2tga -i matrixdvdfull o- matrixdvdfull
What this command line is doing is, first part vtf2tga.exe is telling the command line which program to use in the directory, the -i is the input path and the -o is the output path. Of course if you type the command as listed above, it will create the TGA in the same directory as the .VTF, you can however specify whatever path you want the TGA to go to or which path to read your .VTF materials from, this just appears to be the easiest solution for most people.
You now have a TGA that you can open in Photoshop and edit. See below:
Click on image to enlarge
Now, if you have edited your TGA and want to save it back to a VTF to use in the Hammer Editor and in game, or have created your own TGA texture in Photoshop or similar paint program, you can follow my tutorial for converting TGA to VTF.